Custard Cream Biscuits (Gluten & Wheat Free, Dairy Free)

I am very lucky to have been able to stay with my partner for a long time without either of us actually having to kill the other. Which is a good thing generally, as I think that is illegal.

But the truth is that when you live with one person for that long there are more than one or two near misses (I am so near perfect that he is only ever delighted to find me still living and breathing each morning πŸ˜€ )

IMG_0865

Anyway beyond that – having been together for so long, you do notice things about eachother. For example, he knows that I love raspberries the best in Blighty, blackberries the best in Italy, but mostly I love eating apples. And I know that he could live on nothing other than Custard Cream Biscuits. It was Fathers Day (gee thanks Hallmark Cards) in England yesterday and I thought it would be lovely to make a few really nice fresh ones for him. Traditional but using the best ingredients that I can find and not adding in any weird stuff.

I do use Custard Powder, so have a look just to check that you can find a simple one. You only need to find one with Cornflour, Sugar, Vanilla, Salt and the colour Annatto. I’m not going to stress about Annatto. If you want to know more then read this http://foodreference.about.com/od/Food-Additives/a/What-Is-Annatto.htm But it is perfectly fine πŸ™‚

If you want to avoid Custard Powder then make up your own simple version with 2/3 Cornflour + 1/3 sugar, a pinch of salt and a splash of vanilla extract.

IMG_0205

I also have a lovely girlie that cannot eat gluten, so I made these gluten free, so she could enjoy them too. As you can see from the look on her beautiful face – she thoroughly enjoyed them πŸ™‚

I have to admit …. I snaffled a few myself πŸ˜€

Custard Creams

Makes about 10 lovely big biscuits

For the biscuits:
225g / 7 oz Gluten & Wheat Free plain flour blend
60g / 2 oz of custard powder
30g / 1 oz of icing sugar
210g/ 7 oz sunflower margarine (not the spreadable stuff) at room temperature and diced
1 egg lightly beaten to break it up
1/2 tsp vanilla paste
1/2 tsp sea salt

For the filling:
120g / 4oz sunflower margarine (not the spreadable stuff) at room temperature and diced
420g / 14oz icing sugar, sifted
6 tbsp custard powder

Sift together the flour, custard powder, icing sugar and sea salt and add into the bowl of a food processor with the margarine.
Start to run the machine on the 2:4 speed (half speed – whatever that is on your machine).
Through the feed tube add the egg and the vanilla.
Now turn the machine up and blitz for about 30 seconds.
It will look like a dry crumbly mixture.
Tip out onto a large piece of cling film. And press it so it all sticks together, cover and chill for about 10 minutes.

Line your baking trays with baking parchment.
Preheat your oven to 180˚C/350˚F/ Gas 4.

Gluten free pastries need a little of a different sort of loving care to wheaten pastry. But take your time and if you have any questions then just ask πŸ˜€

IMG_0845

Lightly flour the work surface with more gluten free flour blend.
Start by pressing the dough with your hand and encourage the edges to not split apart. Get it as close to 1cm thick as you can.

IMG_0844

Once you are there roll the dough to 1/2 cm thickness (or perhaps a little thick is good too).
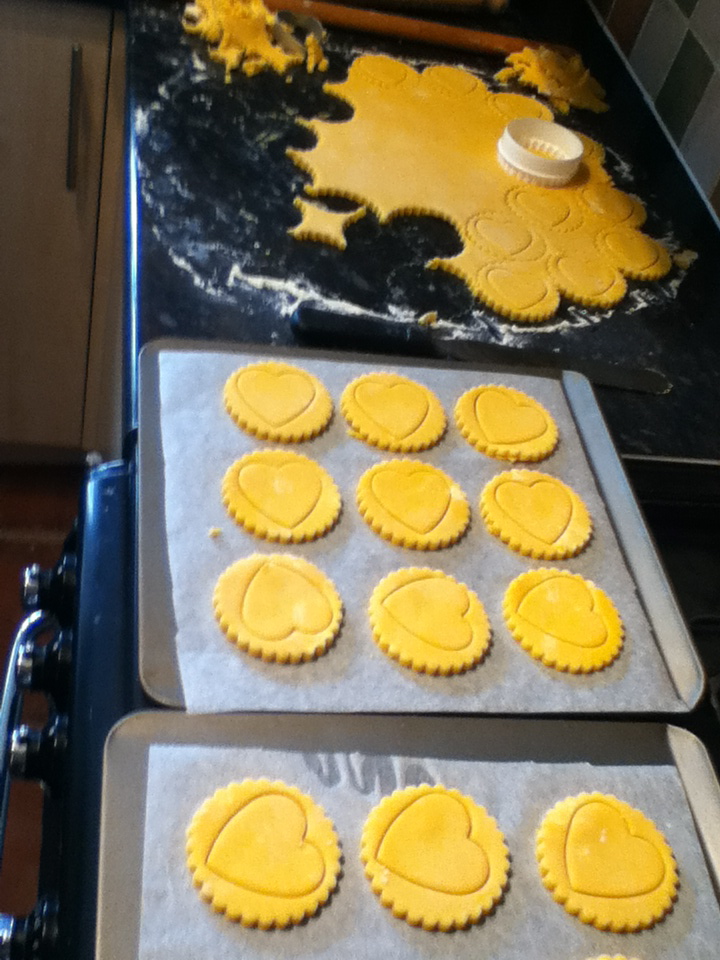
Stamp out rounds with an 8cm round cutter – or a glass or a cup.
Or make really teeny ones and use an egg cup to make them – but keep them thick so you get a real Cartoonish looking final product.
I pressed another cutter (a heart shaped one) about 1/4 of the way through the top to make a nice finish, but there is no need, you can just prick over with a fork instead, or use the tip of a sharp knife to make smiley face perhaps πŸ˜€

IMG_0846

Place onto the baking trays.
As these contain no gluten there is absolutely no point in chilling them before baking – unless of course you are living in a very hot country and the fat has obviously started to melt in which case you can chill then for 10 minutes.
Otherwise – bang then into the oven and bake them for 10 minutes – until just beginning to colour around the edges, and when you touch the edge of the biscuit you can sense ‘firm’.
Leave these on the trays cool for 15 -20 minutes. Then transfer to a rack that can go into the fridge and firm up some more -these are super tender biscuits πŸ™‚

For the filling, just tip all of the ingredients into the bowl of a stand mixer.
Beat for a good 10 minutes until smooth and fluffy, adding a bit of water if you think it needs it.
Get a good dessertspoonful and spread onto one of the cooled biscuits right up to the edge – do not try pressing the biscuits to spread the mixture – they will break πŸ™‚

IMG_0860

And then top with another biscuits.

IMG_0862

Pop directly into expectant ‘Father’ and Daughter No2’s expectant mouths πŸ™‚
If you need to store them then pop in a lidded container in the fridge.

IMG_0858

RAW! Blueberry Caramel Layer Cake

This is another of my RAW! Fresh Cakes that I sell on the market. It is devised to be able to withstand not having to be served straight from the freezer. My stomach does not like anything straight from the freezer (even my ices have to be almost at room temperature otherwise I get a terrible belly ache). And this way the flavours have a chance to be bright and beautiful instead of muted under glacial temperatures.

Again this is one that has been asked ofr – but I still have no camera – really sorry but I just don’t have the spare cash and I don’t want to stop blogging – so I hope you will bare with me.

I am very grateful to those of you that have stuck with me through this ‘no camera/strapped for cash’ period. One day I shall reward you with a slice-o-cake πŸ™‚

IMG_0790

RAW! Blueberry Caramel Layer Cake
No Added processed Sugar, Gluten Free, Wheat Free, Dairy Free, Soya Free, Vegan, Egg Free.

Makes 18 slices

Base
120g / 4 oz hazelnuts
240g / 8 oz cashew nuts
120g / 4 oz walnuts
4 tsp Maca root powder (if you cannot find this no matter -but it adds a lovely flavour and is super good for you too)
1 tsp vanilla extract
240g / 8 oz Medjol dates
1 tsp sea salt

Blueberry Layer
240g / 8 oz raw cashews, ground
120g / 4 oz macadamia nuts
240g / 8 oz Medjol dates
1 tbsp vanilla extract
2 tbsp Lucuma powder
480g / 1 lb fresh blueberries (washed and picked over)
sprinkle sea salt

Caramel Topping
2 tsp vanilla extract
240g / 8 oz Medjol dates
240g / 8 oz ground cashew
1/2 cup agave nectar
2 tbsp melted coconut oil

Line an 9″ x 9″ cake tray with cling film
If you have a dehydrator and suffer from digestive disorders then please – Soak the walnuts and cashew nuts over night. In the morning drain and dehydrate for 16- 24 hours until thoroughly desiccated.
All the nuts need to be processed to a fine flour. I use a coffee grinder for this.

For the base:
Add the dates to the bowl of the food processor with the blade fitted.
Start to process the dates. You will need to open the bowl and scrape it down several times.
Add remaining ingredients and really allow it to process until you have a stiffish dough that balls up. You may need to add a little water to get the right consistency.
Spoon into tray and press down.
Set to one side.

For the Filling:
Add all the ingredients to the bowl of the food processor with the blade fitted. Then blend together until very smooth and soft like a cream cheese.
Pour on top of the base and level off.

For the Topping:
Add all the ingredients to the bowl of the food processor with the blade fitted. Then blend together until very smooth and light and soft like a yogurt.
Just taste it now to make sure the ‘caramel’ is sweet as you like it – I don’t want it too sweet, I like the sour of the fruit to compete with the sweetness of the nuts πŸ™‚
Pour onto the filling and spread evenly again.
Cover with cling film and store in the freezer.

This can be kept in the ice box for 3 months or in the deep freeze for a year.

Before you want to eat it move it to the fridge and allow it to soften for about 4 hours – or you can leave it covered, in a cool spot in the kitchen for about 45 minutes if you prefer.

Utterly guilt free and feels like a total indulgence.

I defy you to eat it and not only love it but feel amazingly well about an hour afterwards

It’s fine, it’s okay, it’s just what I do πŸ™‚Β 

Sweet Potato Cakes with Dill (Vegan) Great For Meatless Monday’s and Frugal Feeding

What a mad couple of weeks. Daughter No1 is home from Uni and Daughter No2 has been sitting her SATS and the sun has come out …. finally! All the garden has gone mad and I have had to get all my plants, seedlings and seeds in while the going was good. And … AND I invested in 4 little poly tunnels as I really need some of the plants to get big enough to eat πŸ™‚

The other thing is that the Metropolitan police have taken nearly 8 weeks to go to Bermondsey Square to look at the CCTV footage of my bag being nicked and ….. surprise surprise – it’s been taped over (Grrrr)

So I still have no camera and I am using Daughter No2’s ipod to take piccy’s and I am sorry that they are not very good.

IMG_0668

But these cakes go down really well at the market, in our house, as foodie gifts to friends – just lovely.

And someone has asked for the recipe …. soooooo….

I hope you love them

Sweet Potato Cakes with Dill
make about 36
450g / 1lb Self Raising Flour
2 tsp baking powder
450g / 1lb Sweet potatoes peeled cut into 2 cm cubes
120g/ 4 oz Waxy potatoes (Estima, Nicola, Wilja, Melody), peeled cut into 1.5 cm cubes
120g / 4 oz carrots peeled cut into 1 cm slices
2 white onions peeled and quartered
125ml / 1/4 pt lemon juice
grated zest of the lemon
4 tsp dried dill
2 tsp dried parsley
1 tsp Sea salt
1/2 tsp ground black pepper
300ml / 1/2 pt sunflower oil (as needed)

Sift the together the flour, baking powder, dill, parsley, pepper and salt

Boil the sweet potatoes, potatoes, onions and carrots together in a pan of salted water for 15–20 minutes until soft.
Drain well.
Tip into a food processor and run on high speed to make a very smooth paste.
Add into the flour mix and add the seasoning and the liquid. It wants to be fairly stiff but still a dropping consistency.
I suggest you check for seasoning now and add more lemon or salt, dill – make it how you like.
Heat the oil in a heavy based frying pan over a medium heat.
Use an ice cream scoop or a tablespoon to scoop up the cakes, add them straight into the hot oil as you scoop.
It should take 2-3 minutes to brown to a nice golden colour, don’t let it go any faster otherwise they won’t be cooked through. Any slower and they will just absorb all the oil.
Turn them to cook the other side.
As they cook pop them onto a warm plate with kitchen roll on to absorb the excess oil.
These can be served as an accompaniment to other food but we had them with this lovely Cardamon Dahl Daughter No1 gave me the recipe for πŸ™‚

http://vitatheeater.wordpress.com/

May I suggest you have a look at her blog too πŸ™‚